Movement and Collisions
In the last section, we saw how to connect Godot up to Semantic-Kernel and create two GPT-4 powered NPCs that could talk with each other. Now, our goal is to take this idea further by embedding such an NPC in a more developed game world, one with movement and collisions.
In this section, we’ll just set up the world with it’s movements and collisions, leaving the task of integrating the GPT-4 powered NPC until a later section. We’ll set up the world shown at the beginning, where there is a river troll blocking a bridge that the player needs to get across. To keep our project organized, we’ll split up this world into three separate scenes: one for the troll, one for the player character, and one for the map. After they are all created, we’ll bring these three scenes together into a level scene.
Part 1: The Troll Scene
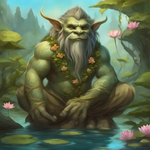
For the river troll, who is named Gralk the Wise, we will create a fairly standard NPC scene using
a CharacterBody2D node as the root with a collision shape and a sprite as children. We’ll also
add a simple script which will provide the ability to move Gralk off of the bridge when
appropriate.
Setting Up the Scene
To start, create a new scene and add a CharacterBody2D node as the root. Rename this node to
Gralk and save the scene as gralk.tscn. In the inspector, set the following property so that
all collisions will be considered to be collisions with walls (not with the ground or ceiling):
CharacterBody2D > Motion Mode = “Floating”
Next, add a CollisionShape2D node as a child of the Gralk node. Set the following property:
CollisionShape2D > Shape = “New RectangleShape2D”
Then, set the following properties for the RectangleShape2D:
RectangleShape2D > Size > x = 75 px
RectangleShape2D > Size > y = 75 px
Finally, add a Sprite2D node as a child of the Gralk node. Download the picture of Gralk
shown below. Add it to the sprite by dragging the file onto the Texture property in the
inspector. (Alternately, you can click on the Texture property and select “Load” from the
drop-down menu. Then find and open gralk.png.)
You might notice the image of the troll is too big for the collision shape we made before. To fix
this, set the following properties on the Sprite2D node:
Node2D > Transform > Scale > x = 0.5
Node2D > Transform > Scale > y = 0.5
Writing the Script
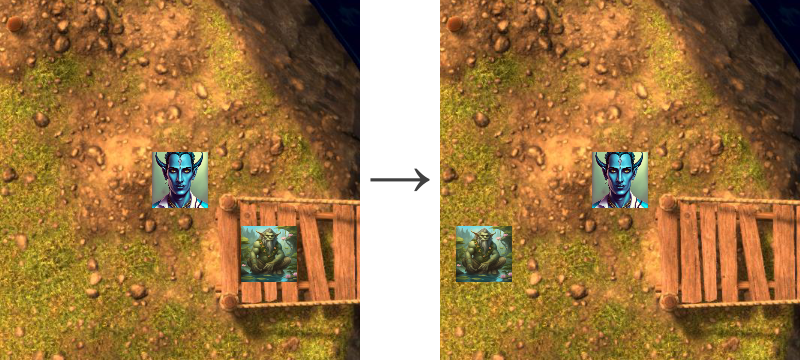
Eventually, we are going to want Gralk to move out of the way after the player has answered his riddle correctly. At this point, we won’t be able to tell automatically when the riddle has been answered, so instead we’ll trigger the movement with keyboard input, just so we can be sure the movement and collisions are all working correctly.
First, attach a new script to the Gralk node. Make sure it is a C# script, that it inherits
from CharacterBody2D, and that it is using the “Node: Default” template. Then save it as
Gralk.cs.
With the script open, we’ll add the property _allowToPassPosition, which will hold the position
that we want to move Gralk to in order to allow the player to pass. In the _Ready() method,
we’ll set this position to be 300 pixels left of Gralk’s starting position (so that Gralk will move
left off the end of the bridge).
// Where Gralk should move to allow player to pass
private Vector2 _allowToPassPosition;

// Called when the node enters the scene tree for the first time.
public override void _Ready()
{
    // Designate where Gralk should move to allow player to pass
    _allowToPassPosition = Position;
    _allowToPassPosition.X -= 300;
}
Next, we can add a method to call when we want to move Gralk out of the way. This script works by using a tween object that will update the position of the node every tick until it reaches a designated end position after a designated amount of time.
// Moves Gralk to allow the player to pass
public void AllowToPass()
{
    Tween moveTween = CreateTween();
    moveTween.TweenProperty(this, "position", _allowToPassPosition, 2);
}
Finally, we’ll add the temporary script that will allow us to trigger this movement by pressing the
ALT key (or the OPTION key on Mac). First, set up a new action in the project’s input map.
(You can access the input map by opening the project settings and clicking on the “Input Map” tab.)
Add a new action called allow_to_pass. Then add the ALT key (or OPTION key) as an input
event for allow_to_pass. Once that’s done, go back to the Gralk.cs script and add the following
in the _Input() method.
// (Temporary) Listen for input to move Gralk out of the way
public override void _Input(InputEvent @event)
{
    if (@event.IsActionPressed("allow_to_pass"))
    {
        AllowToPass();
    }
}
Part 2: The Player Scene
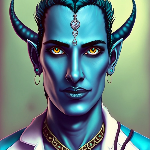
The scene for the player character, whose name is Seraphis, will be set up in the same way as
Gralk’s scene. We’ll have a CharacterBody2D as the root and a collision shape and a sprite as
children. The script, however, will be different since we’ll want Seraphis to be able to move based
on player input.
Setting Up the Scene
To start, create a new scene and add a CharacterBody2D node as the root. Rename this node to
Seraphis and save the scene as seraphis.tscn. In the inspector, set the following property so
that all collisions will be considered to be collisions with walls (not with the ground or
ceiling):
CharacterBody2D > Motion Mode = “Floating”
Next, add a CollisionShape2D node as a child of the Seraphis node. Set the following
property:
CollisionShape2D > Shape = “New RectangleShape2D”
Then, set the following properties for the RectangleShape2D:
RectangleShape2D > Size > x = 75 px
RectangleShape2D > Size > y = 75 px
Finally, add a Sprite2D node as a child of the Seraphis node. Download the picture of
Seraphis shown below. Add it to the sprite by dragging the file onto the Texture property in
the inspector. (Alternately, you can click on the Texture property and select “Load” from the
drop-down menu. Then find and open seraphis.png.)
You might notice the image of Seraphis is too big for the collision shape we made just before. To fix
this, set the following properties on the Sprite2D node:
Node2D > Transform > Scale > x = 0.5
Node2D > Transform > Scale > y = 0.5
Writing the Script
Before we write the script, we should first set up the appropriate actions in the project’s input
map. Add four new actions: move_left, move_right, move_up, and move_down. Then add
the corresponding arrow key as an input event for each of these actions (left arrow key for
move_left, right arrow key for move_right, etc.).
With these actions set up, we can now write a script that will enable Seraphis to move based on
player input. First, attach a new script to the Seraphis node. Make sure it is a C# script,
that it inherits from CharacterBody2D, and that it is using the “Node: Default” template. Then
save it as Seraphis.cs.
We should first add a Speed property to this script and export it to the editor so that we can
easily edit Seraphis’s speed later on if we desire.
// How fast the player will move (pixels/sec)
[Export]
public int Speed = 300;
Next, we’ll want to add code to the _PhysicsProcess() method that will move Seraphis based on
player input. First, we’ll use the method Input.GetVector() to get a 2D vector based on what
input directions are currently being pressed. Next, we’ll make sure this vector either has a
magnitude of zero (for no input) or has a magnitude equal to the Speed property we set earlier.
Finally, we’ll set the built-in Velocity property and call the built-in MoveAndSlide() to
automatically handle movement and collisions for us.
// Called once per physics tick
public override void _PhysicsProcess(double delta)
{
    // Get input vector
    var velocity = Input.GetVector("move_left", "move_right", "move_up", "move_down");

    // Set correct magnitude
    if (velocity.Length() > 0)
        velocity = velocity.Normalized() * Speed;

    // Set Velocity property of this CharacterBody2D
    Velocity = velocity;

    // Call Godot's built-in function for physics-based movement
    MoveAndSlide();
}
Part 3: The Map and Level Scenes
With the two characters set up in their individual scenes, now we’ll work on bringing them together into a single scene. First we’ll set up the map that they’ll move around in. Then we’ll combine all of these elements in a level.
The Map
The map scene is provided premade here: map.tscn. You’ll also need to download the
background image here: forest_bridge.jpg. (The map scene will look for the background
image at res://forest_bridge.jpg, so make sure to save the image in the root folder of your
project. You will be unable to open map.tscn if it cannot find forest_bridge.jpg.) Now, open up
map.tscn. You should see the following scene:
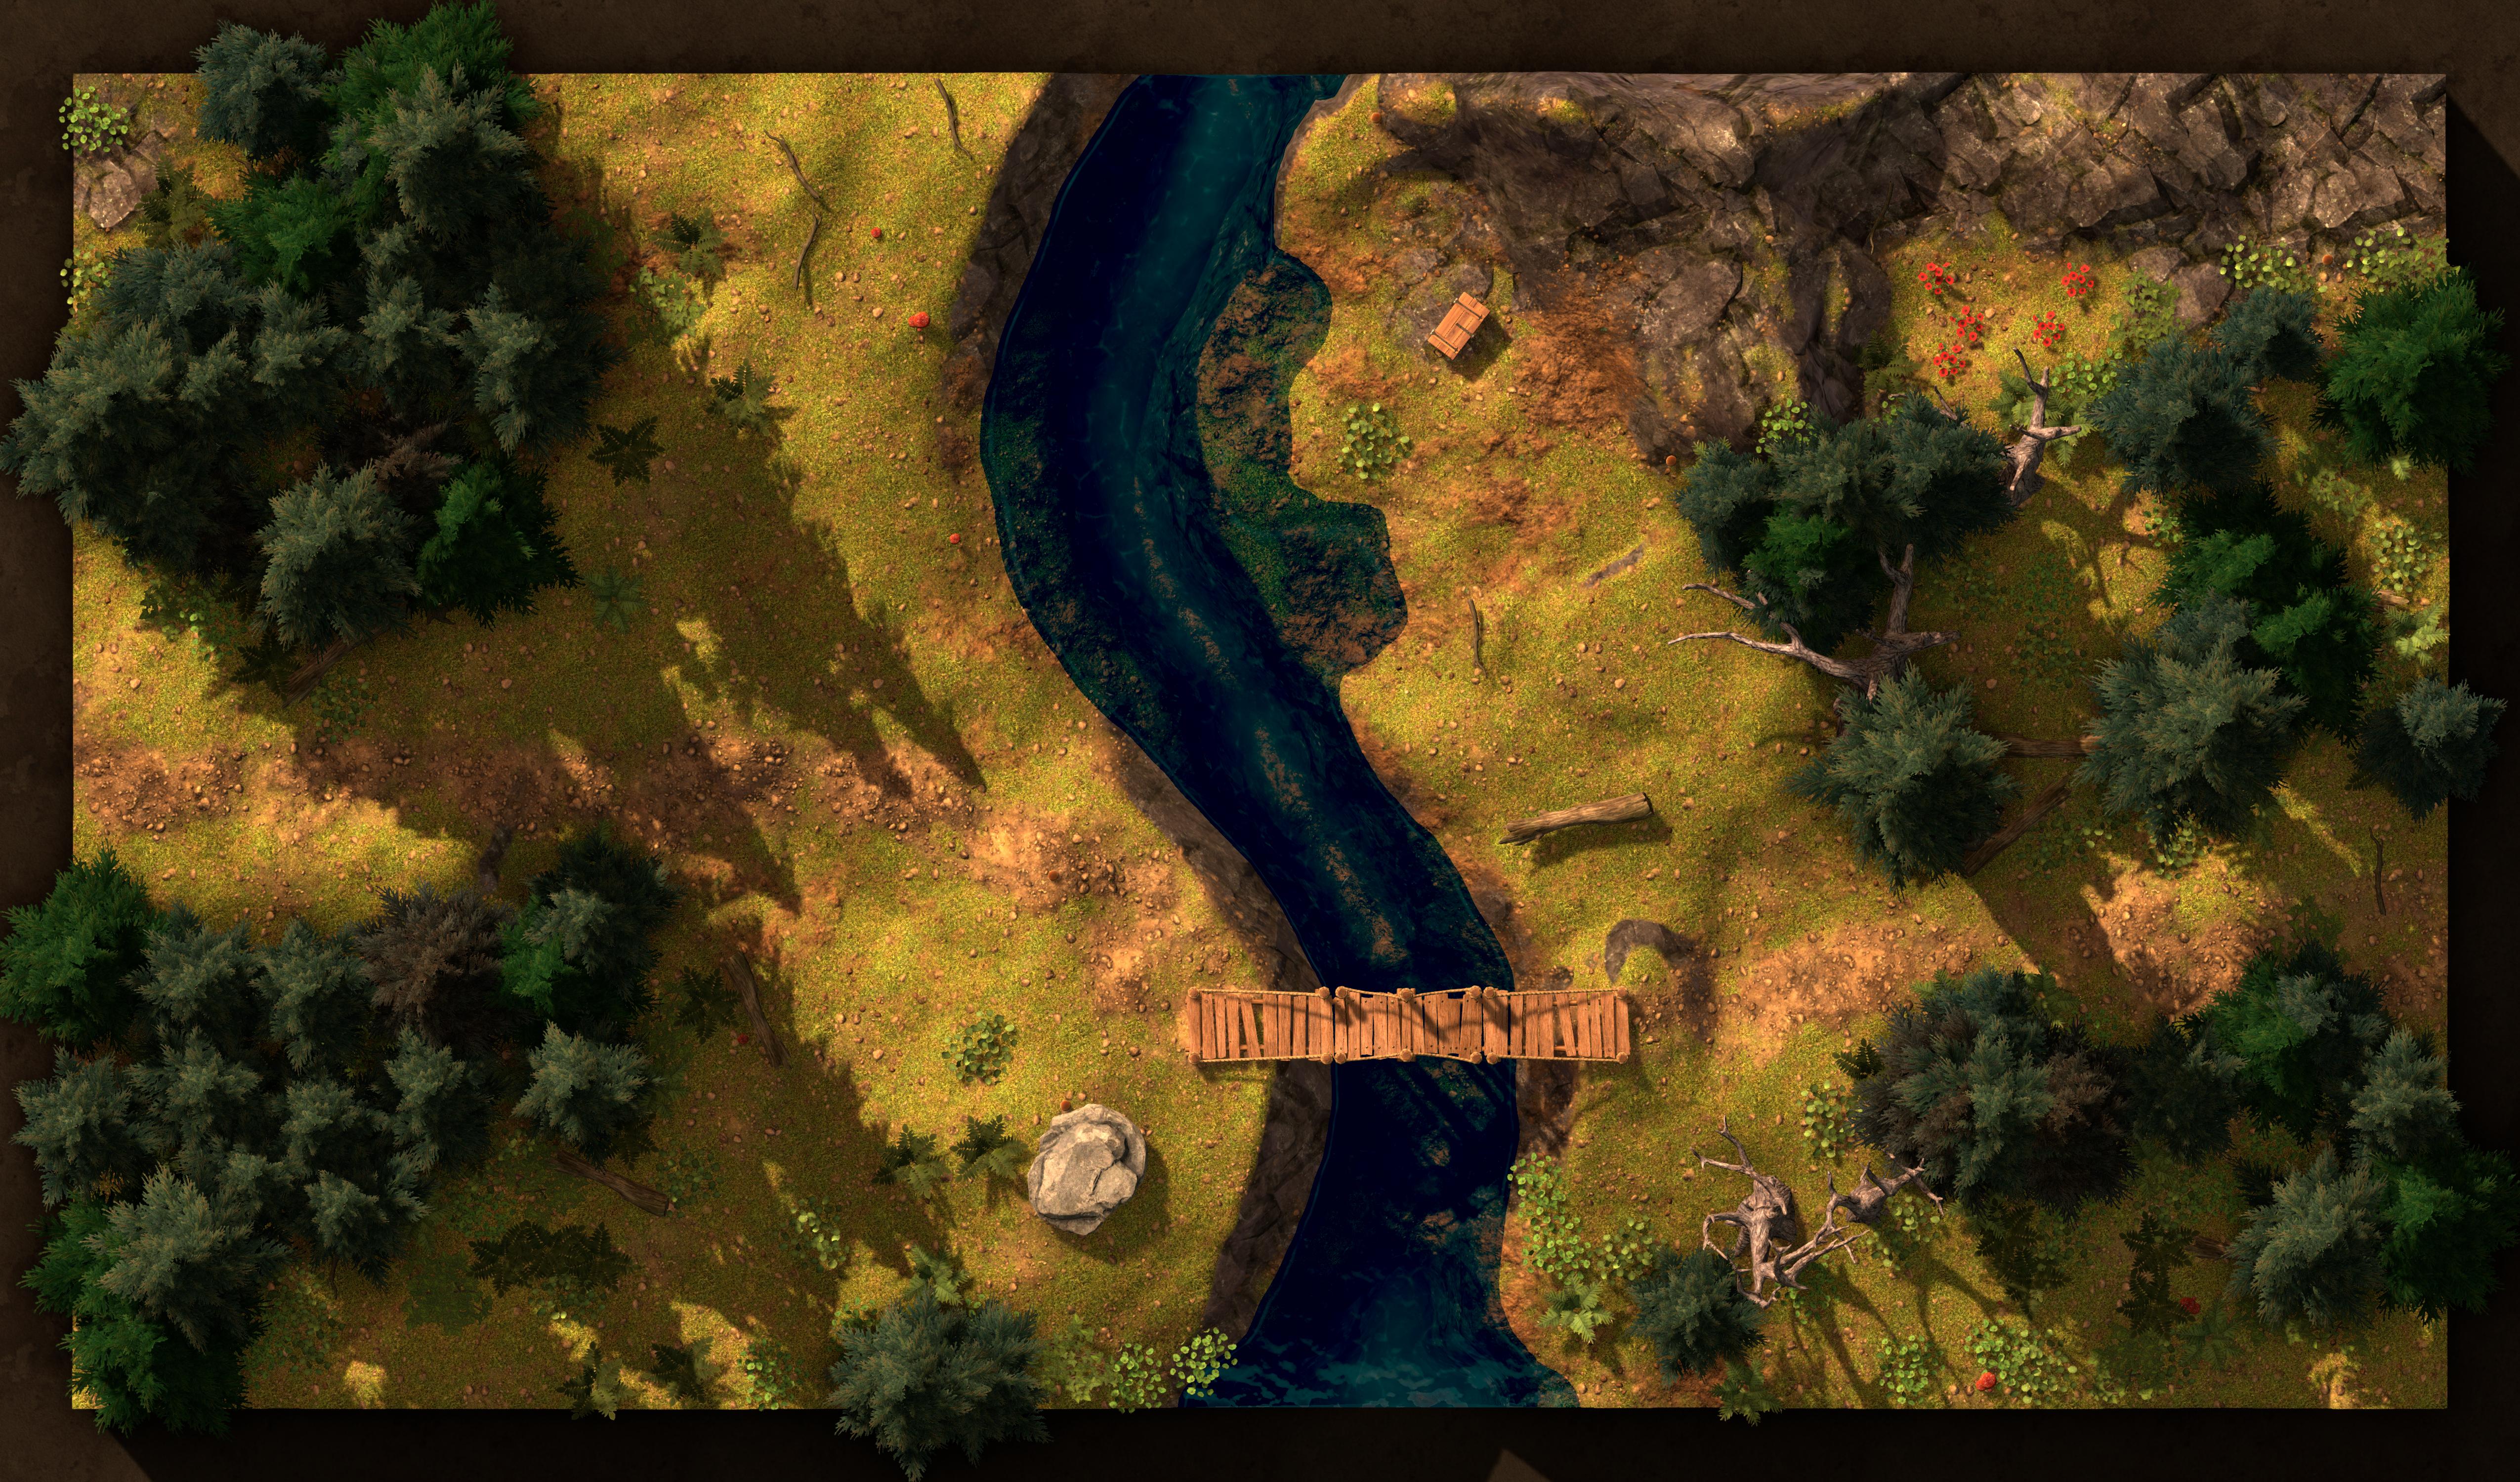
The Level
Now we’ll set up the level scene. To start, create a new scene and add a Node2D node as the
root. Rename this node to Level and save the scene as level.tscn. Add an instance of the
map.tscn scene as a child of the Level node.
Next, add an instance of the gralk.tscn scene as a child of the Level node. (Make sure it is
below the map in the scene tree so that it is drawn on top of the map.) Move Gralk so that he is
located at the entrance to the bridge so that the player will be unable to cross. A position of
(-80 px, 578 px) should work well for this.
Now, add an instance of the seraphis.tscn scene as a child of the Level node. (Again, make
sure it is below the map in the scene tree.) Move Seraphis so that he is located somewhere on the
left side of the river. A position of (-660 px, 278 px) should work well for this.
Finally, we’d like the camera to follow Seraphis around as the player moves him using the arrow
keys. To achieve this, add a Camera2D node as a child of Seraphis.
Try It Out
This scene should now be ready to run! Press F6 (or the “Run Current Scene” button). Confirm that you can move Seraphis around using the arrow keys and that he collides with Gralk and the various environmental obstacles. Try pressing ALT (OPTION on Mac) and make sure Gralk moves out of the way, off the left end of the bridge as intended.
If the window is too small, you can configure display settings in project settings under
Display > Window > Size. Set Viewport Width and Viewport Height to larger numbers, or set
Mode to “Maximized”. You can also adjust the zoom level of the camera by setting the Zoom
property of the Camera2D node.