The Player
In this section we will create the ChatPlayer node, which will be another extension of
ChatEntity. This node will be attached to the player character and will allow it to interact
with the ChatAI nodes. It will be controlled by keyboard and UI input from the player. By the end
of this section, we should be able to see when the player gets close enough to “see” Gralk, when
they start and end conversations, and when they send and respond to messages.
Note
Since we don’t have the UI set up yet, all of this will be shown in the output terminal for now and messages will need to be coded directly in our scripts. After we create the UI in the next section, everything will be visible on the game screen.
Part 1: Writing the ChatPlayer Script
To start, we’ll write the ChatPlayer script, which will extend ChatEntity and will define
how players can interact with AI-powered NPCs. Right click the filesystem dock and create a new
script. Make sure the language is set to C# and it inherits from ChatEntity. Save the script as
ChatPlayer.cs.
Once the script is created, open it up and add the [GlobalClass] attribute above the class
declaration.
using Godot;

[GlobalClass]
public partial class ChatPlayer : ChatEntity
{
    (...)
}
Warning
Godot may automatically add a _Ready() method to the script. If it does,
delete it. An empty _Ready() method will prevent the base _Ready()
method from being called.
Properties
With the ChatPlayer class set up, we can add a few properties to it. First, add a
_controlHint property. This will hold a message that will be displayed to the player to
indicate what kinds of inputs and actions they can do at any given moment.
// The current control hint
private string _controlHint;
Next, add a few signals. We’ll set up these signals to be emitted whenever ChatPlayer does
anything that we might want the UI to be aware of.
// Signals for connecting to the UI
[Signal]
public delegate void ControlHintUpdatedEventHandler(string controlHint);
[Signal]
public delegate void ChatEntityAddedEventHandler(ChatEntity chatEntity);
[Signal]
public delegate void ChatEntityRemovedEventHandler(ChatEntity chatEntity);
[Signal]
public delegate void ConvoStartedEventHandler();
[Signal]
public delegate void ConvoEndedEventHandler();
[Signal]
public delegate void MsgAddedEventHandler(ChatEntity sender, string msg);
Note
Our use of signals here follows the “call down, signal up” convention. Although the UI will not
technically be the parent or ancestor of ChatPlayer, it will exist somewhat higher up in
the scene tree. Additionally, it would never really make sense to use the UI where there is
no ChatPlayer node, but it could make sense to use the ChatPlayer node in a situation
where there is no UI. Using signals here makes it so that the UI doesn’t have to exist in order
for ChatPlayer to function properly.
Control Hint Methods
The first method to add in the ChatPlayer script is the _Process() method, which we’ll use
to keep the control hint updated. Each frame, we’ll evaluate the current game situation and
determine whether we need to update the control hint. If we do update it, we’ll also emit a signal
indicating that.
// Called every frame. 'delta' is the elapsed time since the previous frame.
public override void _Process(double delta)
{
    // Figure out what the control hint should be for this frame
    string newControlHint = "Use the arrow keys to move";
    if (InConvo())
    {
        newControlHint = "Press ESC to end the conversation";
    }
    else
    {
        ChatEntity nearestChatEntity = NearestChatEntity();
        if (nearestChatEntity != null)
            newControlHint = $"Press SHIFT to talk with {nearestChatEntity.ChatName}";
    }
    // If the control hint should be different, update it
    if (newControlHint != _controlHint)
    {
        _controlHint = newControlHint;
        EmitSignal("ControlHintUpdated", _controlHint);
        GD.Print($"Control Hint: {_controlHint}");
    }
}
Note
We’ve added a GD.Print() statement to this method so that we can see in the output terminal
when the control hint changes. The other methods we’ll write for ChatPlayer will have
similar print statements. This is a temporary solution until we complete the UI in the next
section.
Conversation Methods
The next few methods we’ll write will control starting and ending conversations. We want the player
to be able to trigger these methods using keyboard input, so first we need to create two new
actions in the project’s input map: start_convo and end_convo. Let’s add the SHIFT key as
an input event for start_convo and the ESC key as an input event for end_convo.
With that set up, we can override the built-in _Input() method to listen for these actions and
call the corresponding method, either StartConvo() or EndConvo(). We’ll also use
InConvo() to check and make sure the player’s input is valid for the current situation.
// Listen for input to start/end a conversation
public override void _Input(InputEvent @event)
{
    // If input is "start_convo", try to start conversation with the closest entity
    if (@event.IsActionPressed("start_convo") && !InConvo())
    {
        ChatEntity nearestChatEntity = NearestChatEntity();
        if (nearestChatEntity != null)
            StartConvo(nearestChatEntity);
    }
    // If input is "end_convo", try to end conversation
    else if (@event.IsActionPressed("end_convo") && InConvo())
    {
        EndConvo(_inConvoWith);
    }
}
Now we can write StartConvo() and EndConvo() for starting and ending conversations. These
will be overrides of the ChatEntity methods. We’ll first call the base methods. Then, assuming
everything was set up correctly, we’ll notify the NPC that we started or ended a conversation with
them and will emit the corresponding signal.
// Attempts to start a conversation with another ChatEntity.
// Will fail and return false if otherChatEntity is already in a conversation.
public override bool StartConvo(ChatEntity otherChatEntity)
{
    // Do the basic stuff
    if (!base.StartConvo(otherChatEntity))
        return false;

    // If otherChatEntity is a ChatAI, notify it of the start of the conversation
    if (otherChatEntity is ChatAI otherChatAI)
        otherChatAI.Notify($"{ChatName} has started a conversation with you.");

    // Indicate that a conversation was started
    EmitSignal(SignalName.ConvoStarted);
    GD.Print($"Conversations: Started a conversation with {otherChatEntity.ChatName}");

    // Return success
    return true;
}

// Attempts to end a conversation with another ChatEntity
// Will fail and return false if otherChatEntity is not in a conversation with this ChatEntity
public override bool EndConvo(ChatEntity otherChatEntity)
{
    // Do the basic stuff
    if (!base.EndConvo(otherChatEntity))
        return false;

    // If otherChatEntity is a ChatAI, notify it of the end of the conversation
    if (otherChatEntity is ChatAI otherChatAI)
        otherChatAI.Notify($"{ChatName} has ended their conversation with you.");

    // Indicate that a conversation was ended
    EmitSignal(SignalName.ConvoEnded);
    GD.Print($"Conversations: Ended a conversation with {otherChatEntity.ChatName}");

    // Return success
    return true;
}
Messaging Methods
Next, we’ll override the SendMsg() and ReceiveMsg() methods from ChatEntity. Besides
calling the base method in SendMsg() (which does the work of sending the message to
the entity that we’re currently in a conversation with), we’ll also emit a signal that can be
picked up by the UI.
// A useful shorthand for sending a message
public override void SendMsg(string msg)
{
    // Send the message to ChatEntity _inConvoWith
    base.SendMsg(msg);

    // Emit a signal that there is a new message (for UI)
    EmitSignal(SignalName.MsgAdded, this, msg);
}

// Called when ChatEntity _inConvoWith emits a MsgSent signal
public override void ReceiveMsg(string msg)
{
    // Emit a signal that there is a new message (for UI)
    EmitSignal(SignalName.MsgAdded, _inConvoWith, msg);
}
Note
The SendMsg() method should already have a print statement in its base definition in the
ChatEntity class. Because of this, we haven’t added any print statements here.
Nearby ChatEntity Methods
Finally, the last two methods that we’ll write for ChatPlayer will be OnChatEntityEntered()
and OnChatEntityExited(). These are also overrides of ChatEntity methods. The base
methods simply keep track of nearby entities as they come into or move out of the player’s
vicinity. Besides calling these base methods, we’ll also emit a signal that the UI can pick up.
// Called when another ChatEntity enters the collision area of this ChatEntity
protected override void OnChatEntityEntered(ChatEntity enteringChatEntity)
{
    base.OnChatEntityEntered(enteringChatEntity);
    EmitSignal("ChatEntityAdded", enteringChatEntity);
    GD.Print($"Nearby Entities: {enteringChatEntity.ChatName} has entered your vicinity");
}

// Called when another ChatEntity exits the collision area of this ChatEntity
protected override void OnChatEntityExited(ChatEntity exitingChatEntity)
{
    base.OnChatEntityExited(exitingChatEntity);
    EmitSignal("ChatEntityRemoved", exitingChatEntity);
    GD.Print($"Nearby Entities: {exitingChatEntity.ChatName} has exited your vicinity");
}
Part 2: Using the ChatPlayer Node
Having written the ChatPlayer script, we’re now ready to add a ChatPlayer node to the
Seraphis scene. Doing so will enable the player to interact with Gralk and other ChatAI NPCs.
Attaching to Seraphis
First, open up the seraphis.tscn scene that we made previously. Add a new ChatPlayer node as
a child of the Seraphis node.
Note
Since we used the [GlobalClass] attribute on the ChatPlayer script, it should show up
as an option in the “Create New Node” dialogue box. If it is not showing up, you may have to
rebuild the project first. You can do this by clicking the “Build” button in the top-right
corner of the screen. For more information about Godot’s global classes, see
https://docs.godotengine.org/en/stable/tutorials/scripting/c_sharp/c_sharp_global_classes.html.
On the ChatPlayer node, set the ChatName property to “Seraphis”. In this project, setting
ChatDescr is not necessary for player characters. Feel free to leave it blank or set it to any
appropriate description.
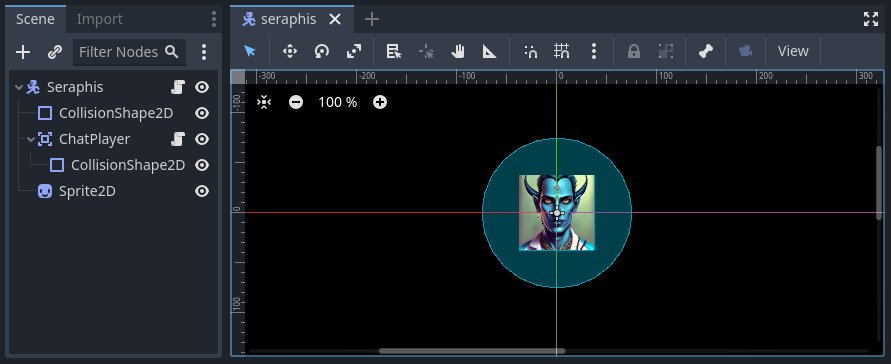
Since the ChatPlayer node inherits from Area2D, it expects to find some sort of collision
node as one of its children. Let’s add a CollisionShape2D as a child of the ChatPlayer
node. Then set the following property:
CollisionShape2D > Shape = CircleShape2D
For the CircleShape2D, set the following property:
CircleShape2D > Radius = 75px
Tip
You can change the shape to anything that seems appropriate to you. But remember that the
ChatPlayer node won’t be able to “see” anything until it enters the collision shape, so
make sure that the shape extends some distance beyond the borders of the sprite.
Your Seraphis scene should now look something like this:
Updating Seraphis Script
Finally, we also need to make a small change the Seraphis.cs script. Right now, it will be possible for the player to move around while in a conversation. This might be confusing when editing messages, as arrow key input could be meant to move the character around on the map or it could be meant to move the cursor around in the text input box. To solve this problem, we’ll just make it impossible for the player to move while in a conversation.
To implement this solution, we’ll need our Seraphis.cs script to have a reference to the
ChatPlayer node. Open up the script and declare a new property called MyChatPlayer. Then,
in the _Ready() method, search for the ChatPlayer node and set MyChatPlayer to
reference it.
// The ChatPlayer node
public ChatPlayer MyChatPlayer;

// Called when the node enters the scene tree for the first time.
public override void _Ready()
{
    // Set up MyChatPlayer
    MyChatPlayer = FindChild("ChatPlayer") as ChatPlayer;
    if (MyChatPlayer == null)
        GD.PrintErr(Name + " cannot find ChatPlayer");
}
Now that we have access to the ChatPlayer node, we can check to see whether it is in a
conversation by calling the InConvo() method. If it is in a conversation, we’ll prevent the
player from moving by setting velocity to zero. Otherwise, we’ll allow the player to move like
normal. To achieve this behavior, change the _PhysicsProcess() method to the following:
// Called once per physics tick
public override void _PhysicsProcess(double delta)
{
    // In a conversation, cannot move
    if (MyChatPlayer.InConvo())
    {
        Velocity = Vector2.Zero;
    }
    // Not in a conversation, can move
            else
    {
        // Get input vector
        var velocity = Input.GetVector("move_left", "move_right", "move_up", "move_down");

        // Set correct magnitude
        if (velocity.Length() > 0)
            velocity = velocity.Normalized() * Speed;

        // Set Velocity property of this CharacterBody2D
        Velocity = velocity;
    }

    // Call Godot's built-in function for physics-based movement
    MoveAndSlide();
}
Try It Out
Now that the ChatEntity, ChatAI, and ChatPlayer scripts have all been completed and we
have them attached to the Gralk and Seraphis scenes, we should be able to hold a simple
conversation between the player and Gralk.
First, since we haven’t created the UI yet, we don’t have a way to write messages while the game is
running. For now, let’s hard code a message into the ChatPlayer script. Add the following line
just before the return statement in the StartConvo() method. Now the message “Hello! How are
you on this fine day?” will be sent automatically whenever we start a conversation.
public override bool StartConvo(ChatEntity otherChatEntity)
{
    (...)

    // (Temporary) Send greeting message to otherChatEntity
    SendMsg("Hello! How are you on this fine day?");

    // Return success
    return true;
}
With this set up, let’s test everything to make sure it is working. Open level.tscn and run the scene. You should immediately see the following message in the Output tab:
Control Hint: Use the arrow keys to move
Move toward Gralk. When you get close enough, the following messages should show up:
Nearby Entities: Gralk has entered your vicinity
Control Hint: Press SHIFT to talk with Gralk
Press SHIFT to start a conversation with Gralk. You should then see the following:
NOTIFY: Seraphis has started a conversation with you.
Conversations: Started a conversation with Gralk
Seraphis: Hello! How are you on this fine day?
Control Hint: Press ESC to end the conversation
After a moment, you should get a response from Gralk that looks something like this:
Gralk: Ah, greetings, traveler! I am Gralk the Wise, guardian of this bridge. I'm as well as a troll can be, thank you. Now, before you cross, there's a small matter of a riddle to solve. Do you have a subject in mind, preferably related to the Forgotten Realms universe?
End the conversation by pressing ESC. You should see the following:
NOTIFY: Seraphis has ended their conversation with you.
Conversations: Ended a conversation with Gralk
Control Hint: Press SHIFT to talk with Gralk
Finally, move away from Gralk. Once you have gotten far enough away, the following messages should show up in the Output tab:
Nearby Entities: Gralk has exited your vicinity
Control Hint: Use the arrow keys to move
Before moving on to the next section, it would be a good idea to delete the line that we added to
the StartConvo() in the ChatPlayer script.